 (Image via
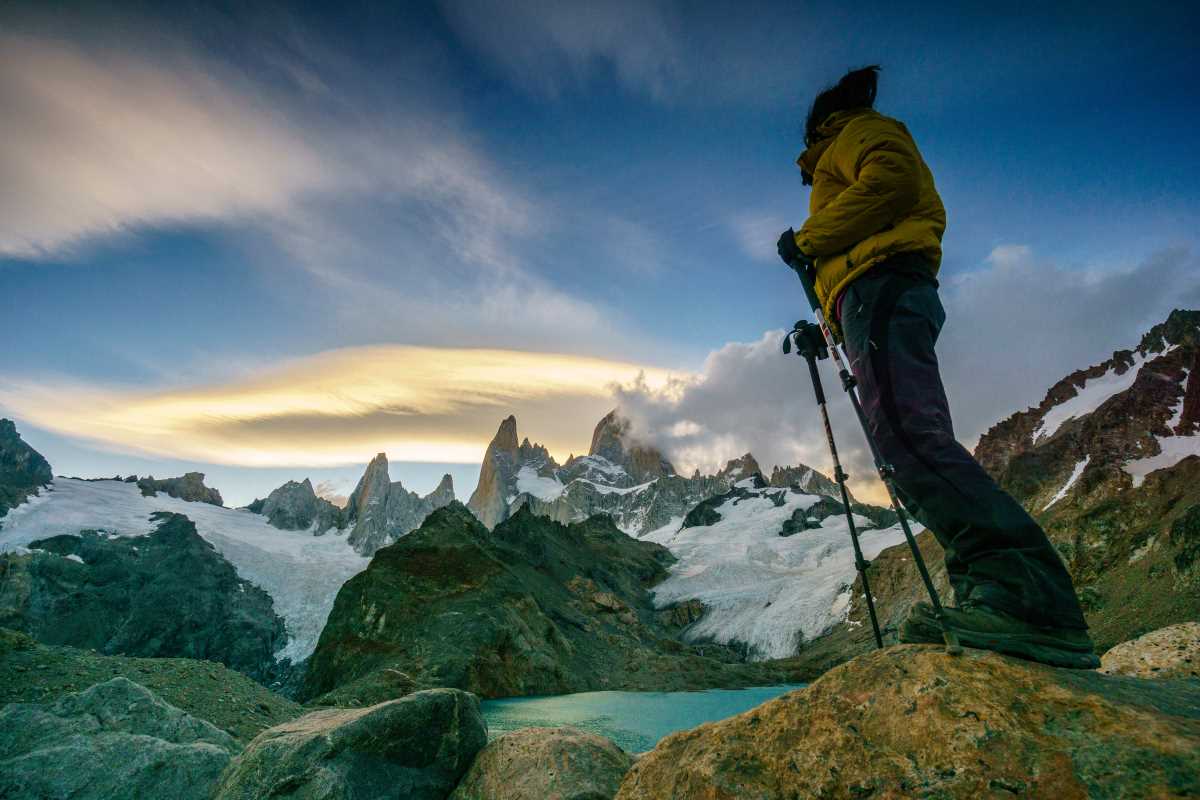
Cold air brushes against rugged mountain slopes while clouds move slowly above deep blue glacial lakes. Boots press into the spongy earth as a camera rises, ready to capture sunlight glinting off weathered rock. Every moment in Patagonia brings something new—a shifting sky, a sudden gust, or a change in color that transforms the scenery. Each photograph becomes a window into a land that changes constantly, rewarding patient exploration. The experience extends far beyond simple photographs, inviting a closer look at the layers, tones, and patterns that give this remote region its unique and untamed character.
Along winding trails and beneath shifting skies, you discover how small choices shape the story your images tell. Viewpoints emerge only when you pause long enough to sense a landscape’s heartbeat. Tools thrive in chilling winds and endless horizons. Moments arrive unexpectedly in the hush before dawn. Each element adds a secret note to your visual narrative, inviting you to see Patagonia in ways that linger long after you return home. Dive into this guide to deepen your connection and elevate every click of the shutter on your photography journey.
Frame Your Unique Perspective
Embrace geological layers as visual guides. Notice fold lines in rock faces, patterns etched by millennia of glacial movement. Position yourself so these natural striations guide the viewer’s eye from foreground to distant peaks. By aligning ridges and rock bands with your frame’s diagonals, you hint at the colossal forces that shaped this terrain. This simple choice adds depth and energy without relying on bold color or dramatic skies.
Engage with impermanent elements. Clouds, falling light, and windblown grasses exist in constant motion. Rather than chase perfect symmetry, lean into asymmetry created by a single illuminated tuft of grass or a burst of sunlight through a gap in clouds. That fleeting imbalance carries emotional weight, reminding viewers that these moments arrive unannounced and cannot be fully recreated. It also urges you to stay present, blending observation with intuition.
Gear and Techniques for Patagonia’s Extremes
- Weather-Sealed DSLR Body
- Purpose/Benefit: Protect sensitive electronics from rain and grit to maintain reliable performance in tough field conditions.
- Steps:
- Wipe the body with a microfiber cloth after each shot to remove moisture.
- Secure lens mounts firmly before entering heavy winds.
- Regularly check all seals for signs of wear or salt buildup.
- Cost/Availability: $1,500–$3,000 USD at major camera stores.
- Insider tip: Stash silica packets in your camera bag to absorb humidity and reduce fungus risk.
- Wide-Angle Zoom Lens
- Purpose/Benefit: Capture sweeping panoramas and dramatic foreground-to-sky compositions.
- Steps:
- Extend the zoom to 16–24mm equivalent for expansive vistas.
- Focus one-third into the scene to maximize depth of field.
- Use aperture f/8–f/11 for sharpness from foreground to background.
- Cost/Availability: $800–$1,500 USD; rentals available from gear companies.
- Insider tip: Add a polarizing filter to reduce glare on water and enhance rock textures.
- Portable Tripod with Gimbal Head
- Purpose/Benefit: Stabilize heavy lenses for glacial or mountain shots without fatigue.
- Steps:
- Extend tripod legs to just above backpack height for quick adjustments.
- Mount the lens on the gimbal head for balance.
- Pan smoothly along glaciers or ridges for stitched panoramas.
- Cost/Availability: Carbon-fiber tripods start at ~$200; gimbal heads ~$150.
- Insider tip: Use silicone leg wraps for extra grip on icy surfaces.
- Battery Warmth Pouch
- Purpose/Benefit: Preserve charge in freezing temperatures.
- Steps:
- Slip batteries into a neoprene pouch close to body heat.
- Replace batteries only during sunny breaks.
- Rotate pouch placement between chest and armpit for warmth.
- Cost/Availability: Under $20; fits most battery sizes.
- Insider tip: Choose bright colors to spot batteries quickly in snow or low light.
- Offline Topographic Maps App
- Purpose/Benefit: Navigate hidden valleys, ridges, and water gaps without cell coverage.
- Steps:
- Preload high-resolution topo tiles for target areas.
- Mark waypoints for sunrise spots and water sources.
- Track movement against contour lines to avoid steep gullies.
- Cost/Availability: $30–$60 per year via app stores.
- Insider tip: Add notes about wind direction and cloud cover to optimize future shoots.
- Raw Processing Workflow
- Purpose/Benefit: Maximize dynamic range in bright snow and dark rock contrasts.
- Steps:
- Import RAW files into editing software with lens correction.
- Apply graduated exposure adjustments to recover highlights and shadows.
- Export multiple contrast versions for web sharing.
- Cost/Availability: Free trials available; licenses around $100.
- Insider tip: Create presets per location for quick haze reduction and color calibration.
When you practice these methods, you will notice every layer of the landscape, from hidden scree fields to sculpted ice flows. Adjust your gear choices to specific campsites and possible weather turns, and keep your vision flexible so you capture the raw essence of this wild region.
Maximize Light and Landscape
Capture Patagonia’s beauty by watching how light transforms spires at dawn, skies at dusk, and seascapes at midday. Focus on close-up details like wind-bent trees or moraines to tell intimate stories beyond wide panoramas. Experiment with long exposures to reveal motion in wind and water, highlighting the region’s restless energy. Each image becomes a chapter of Patagonia’s spirit, inspiring creativity long after your journey ends.